
Adding an email signature to your emails is a great way to provide contact information, personalize your messages, and maintain a professional appearance. Here’s a step-by-step guide on how to add an email signature in commonly used email platforms:
Outlook Application in 5 simple steps
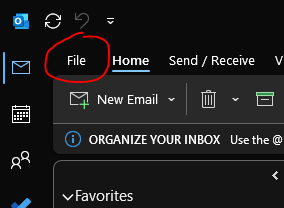
- First is to Click on file tab menu as shown in the image below
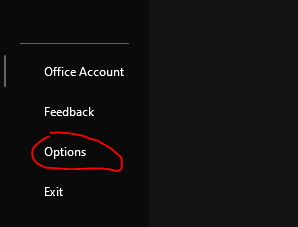
- Then look at the bottom of the screen of the menu where you can find OPTIONS and click on it.
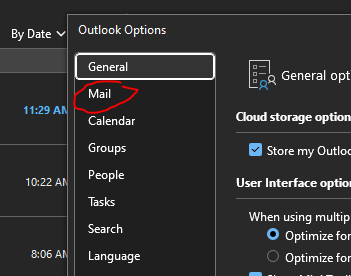
- It will open a new windows, then under General Option where you can find Mail option, click on it.
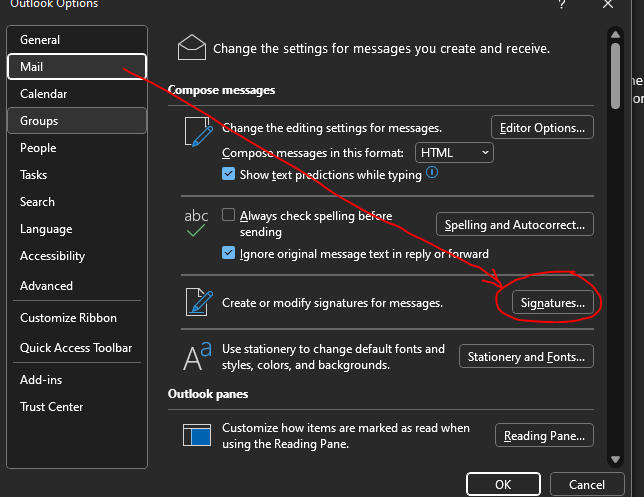
- In the right corner where you can find the signature button. Proceed on that button and you'll start editing your own email signature.
 '
'
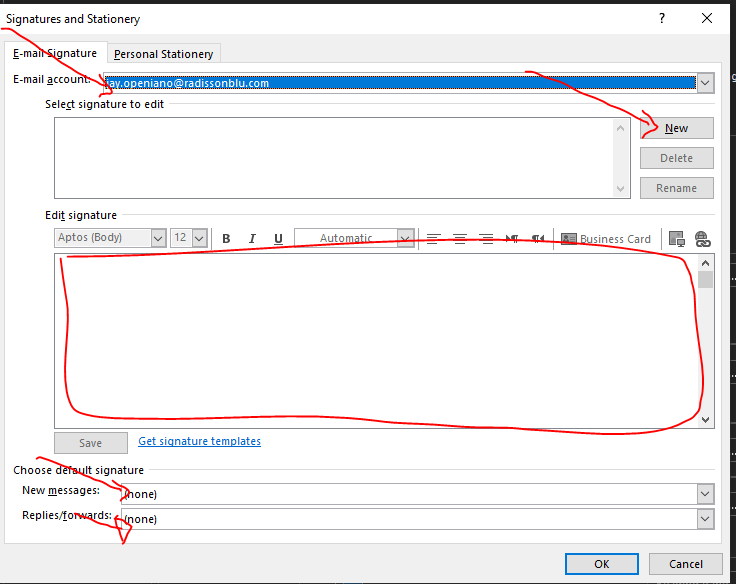
- If you have multiple email account added from the outlook application, make sure you have selected the correct email that you are going to create a signature.
- Fill the information as follows. Email Account, New Button, Edit Signature in the textbox, Choose default signature for new messages and replies/forwards email.
- Save and you are done!
Gmail
Open Gmail: Go to your Gmail account and click on the gear icon (Settings) in the upper-right corner, then select "See all settings".
Navigate to Signature Settings: In the Settings menu, scroll down to the "Signature" section.
Create Your Signature: Click on the radio button to enable the signature feature if it's not already enabled. Then, enter your desired signature in the text box. You can format your signature using the text formatting options available (like bold, italics, links, etc.).
Save Changes: Once you’ve created your signature, scroll to the bottom of the page and click "Save Changes".
Compose a New Email: Now, when you compose a new email, your signature will automatically be appended to the bottom of the email.
Apple Mail (Mac)
Open Apple Mail: Launch the Mail application on your Mac.
Access Preferences: Click on "Mail" in the top menu bar, then select "Preferences".
Create Your Signature: In the Preferences window, click on the "Signatures" tab. Click the "+" button at the bottom to create a new signature.
Edit Signature: Enter your signature in the text box. You can format your signature using the text formatting options provided (font, size, color, etc.).
Assign Signature: In the left-hand column, choose the email account to which you want to assign the signature (if you have multiple accounts). Then, select your newly created signature on the right-hand side.
Close Preferences: Close the Preferences window to save your changes.
Compose a New Email: Your signature will now automatically appear at the bottom of every new email you compose using the selected email account.
Mobile Devices (iOS and Android)
Adding a signature on mobile devices varies by email app. Generally, you can find the option under the app’s settings or preferences. Here’s a basic outline:
- iOS (Mail app): Go to Settings > Mail > Signature. Enter your desired signature.
- iOS (Gmail app): Open the Gmail app > Menu icon (three horizontal lines) > Settings > Tap your email account > Signature settings.
- Android (Gmail app): Open the Gmail app > Menu icon (three horizontal lines) > Settings > Tap your email account > Signature settings.
Follow these steps according to your specific email provider and device, and you’ll have a professional email signature ready to go in no time!


Article Comments
What's on your mind? Leave a Comment.